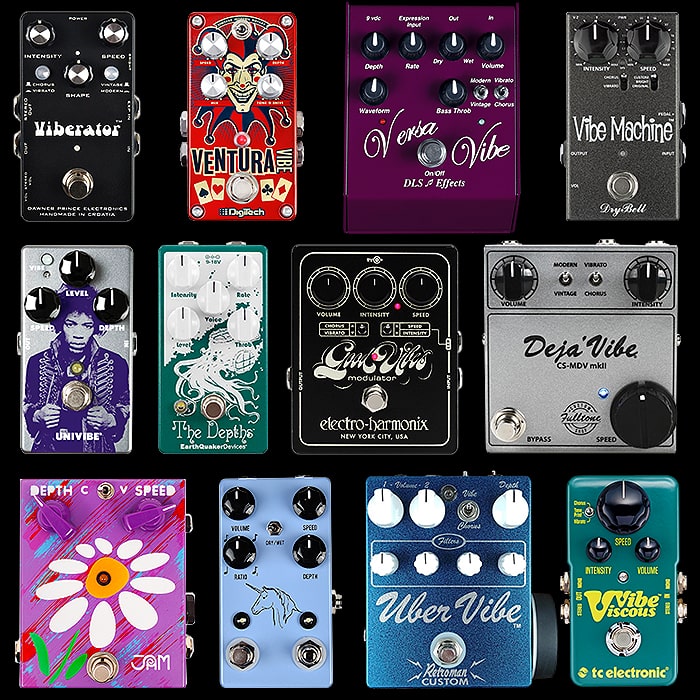
DryBell Celebrates 10 Years of its Magnificent Vibe Machine - with an even more flavoursome V3 Edition
I must admit I’m a little late to the Vibe Machine - obviously around 10 years late! Timing is everything though, and I’m fortunate to own this latest version of the ultimate Uni-Vibe style pedal as far as I’m concerned.
The Vibe Machine is a veritable Iceberg or Tardis even with hidden depths and breadth. Fittingly the latest version has been honed for even greater modulation texture to deliver a deeper and wider tonality. In fact this pedal is all about hidden depths - where there are really 4 levels to its brilliance.
Level 1 : Top Surface Controls
At the top level you have just 4 visible controls :
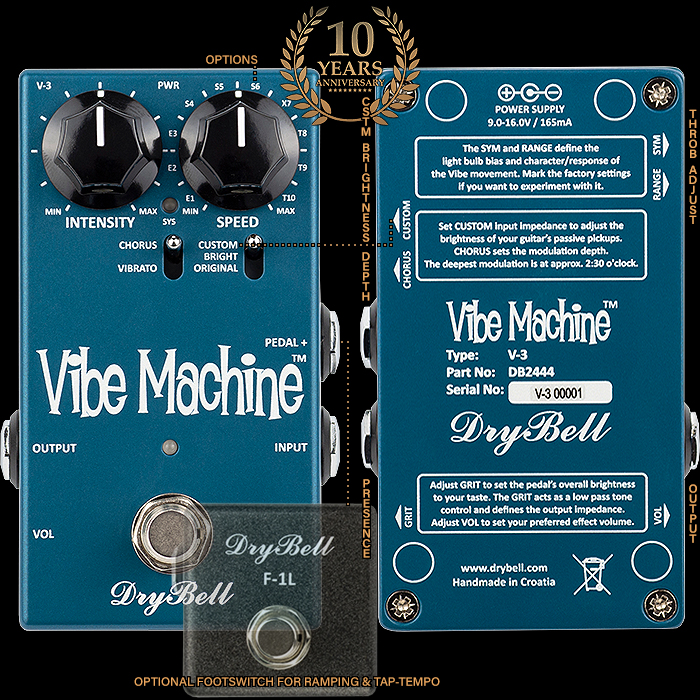
Intensity, Speed / Options, Mode : Chorus / Vibrato, and Input Impedance / Brightness : Custom / Bright / Original.
For some players this will be as deep as they need to go as these pedals are supplied superbly calibrated right from the assembly room. Just set the Speed and Intensity, select Chorus or Vibrato mode - and how bright you want it to sound. With Original being the Stock level (least colouring), then Bright(er) in the middle, and typically Brightest at the top. The Custom mode can then be adjusted via a side-accessible Custom trim pot if you feel the need to change it. Right from the get go it produces incredible textures and tones with the minimum of fuss - several won't have any need to make any adjustments at all to the 6 side-accessible Trim-pots.
Note that the Brightness Control actually changes Input Impedance - which is what results in a Brighter or Darker tonality. Buffers will have a significant impact on how that interacts - which may mean you need to adjust the Custom setting / Trimmer. For me and my rig it was calibrated fine on arrival, and all worked perfectly out of the box!
Level 2 : Side Trimmer Controls
Level 2 is the 6 Trim-pots which sit 3 to a side on the left and right side of the pedal :
Custom Brightness, Chorus Depth, Grit/Presence, Throb Adjust } Symmetry, Range, Volume/Output
Only the Volume is labelled on the front - while each trimmer is properly labelled and referenced on the rear of the pedal - which is the viewpoint we will adopt to detail the other 5 trim-pot controls. So looking at the rear and moving down the pedal top to bottom. The left-side has Custom (Brightness), Chorus (Depth), and Grit (Presence), while the right-side has Symmetry and Range for adjusting the Throb of the 4 photocells, and finally a Volume/Output control for adjusting the level. You get a cool plastic tool included to adjust the trimmers.
As mentioned up top, this pedal is superbly and optimally calibrated from the offset - so you should be able to leave most of these alone. The only one I messed around with really was the Input Impedance / Custom Brightness - just to see what options there were there for me - everything else sounded pretty much perfect already - so I left all those alone for now. It's not really recommended that you Adjust the Symmetry and Range Throb elements as those are really very precisely calibrated and the interactivity of those controls can make it a touch fiddly to sweep the changes, and you may find it hard to return back to the optimal tuning - which is why DryBell recommend you note the positions of the Trim-pots before you start moving and experimenting with them. Do note that in this latest version that the Sym and Range Trimmers are far easier to adjust than before.
For me everything sounded excellent right from the start - and the only thing I was tempted to do was see what kind of tertiary Brightness flavour profile I could get with that Custom Brightness / Input Impedance trimmer.
Level 3 : Speed Knob Pedal+ Options
The next / 3rd level is adding / assigning hardware - in terms of Expression Pedals or Remote / External Switches. I pretty much knew before I acquired the pedal that I wanted Leslie-style ramping dual-speed control. And I of course heartily recommend you get the dedicated DryBell F-1L Footswitch for those purposes. You can choose others of course - but you will likely need to spend further time calibrating those devices. While the F-1L has been bespoke designed to be used with this pedal.
By default when you first switch on the pedal - the E1 Option is selected by default - where the modulation gets slowed right down when you hit the mini footswitch. You then need to stomp the main pedal off and back on again to get the Speed up to where the Speed dial points. So 'E1' pretty much slows you down to a grind wherever you are on the dial.
To activate other modes you need to set the Speed Dial to one of 6 positions marked around that knob - or E1, E2,
E3, S4, S5, and S6. The first three options select the preferred Expression Pedal Mode as follows :
- E1 : Exp. pedal OR speed pot changes speed; Cancel; Leslie ramp; NO Tap tempo
- E2 : Only exp. pedal changes speed; Cancel; Leslie ramp; Tap tempo
- E3 : Exp. pedal OR speed pot changes speed; Cancel; Leslie ramp; Tap tempo
While the S4-S6 are the External Footswitch Modes :
- S4 : Cancel function only
- S5 : Cancel function and Tap-tempo function
- S6 : FAST/SLOW function with Leslie ramp delay; Two speed switch
For my purposes the preferred selection is S6 - to set that you need to point the dial to S6 and then literally prod the External Pedal jack 3 times into the Pedal+ socket within 3 seconds. I mis-read those instructions initially and was fully unplugging and plugging in the cable which does not work. You literally need to push until you feel the slightest resistance, then remove, and prod a couple more times in the same way. You know when you've been successful when the main LED changes from Green to Orange for a couple of seconds and then back to Green. You are now in Leslie Mode - where the slow speed is what flashes currently (in Green) and which you can adjust at any time. By default there is already a Max Speed value assigned, and a middling transition / ramp speed - between the Slow and Fast Modes. To set the Fast Mode you wiggle the Speed dial a few times - until the main LED goes red - you then you know you are in Fast and Ramp Time setting Mode. Where you move the dial to the required Fast Speed, and then hit the External Footswitch to save that, then you set the Ramp Time in seconds (1-10 on the scale) and save via External Footswitch again - where for both I set them around the 3 o'c or between the T8 and T9 marks.
The process can be a little fiddly initially but you soon get the hang of it and I was up and running with my preferred settings in no time at all - and which are now saved to the pedal's memory, even when off.
Level 4 Setup Mode - Calibrations and Refinements
The final 4th level is the most complex and is to do with further calibrating external pedal compatibility as well as fine-tuning your preferences. There are in essence 2 banks of Setup Menus - where you access the second bank via selecting the 10th / T10 Mode on the First Bank.
To get into Setup Mode you need to do wiggling of a different kind - first toggle the Chorus/Vibrato switch, and within 4 seconds press the main pedal's footswitch 4 times rapidly. The main LED will momentarily blink Orange 5 times to indicate you've entered the Setup Menu Options.
You then have 9 Options available to you on the First Menu :
SETUP MENU 1
- 1 : E1 - Expression Pedal Potentiometer Selection | Default = Linear Taper
- 2 : E2 - Expression Pedal Potentiometer Taper Curve Fine Tuning | Default = Taper A
- 3 : E3 - Expression Pedal Direction Reversal | Default = Standard Direction, Cancel Heel Down
- 4 : S4 - External Footswitch Type Selection | Default = Latching Footswitch
- 5 : S5 - Cancel Function Type Selection | Default = Vibe Machine Cancel for V-2, Uni-Vibe Cancel for V-3
- 6 : S6 - Cancel Delay Adjustment (when using EXP. Pedal) | Default = 0.5 Sec
- 7 : X7 - Tap Tempo Multiplier select for T10 Position | Default = x3
- 8 : T8 - Internal Incandescent Light Bulb Lamp On/Off when Pedal in bypass | Default = Internal Lamp stays on when the Pedal is switched off
- 9 : T9 - System LED On/Off when Pedal is in Bypass | Default = System LED works always
- 10 : T10 - Select to ENTER SETUP MENU 2
And a further 5 settings in Bank 2, as follows - note that 3 options are for Factory Modes, and 2 are not currently in use :
SETUP MENU 2
- 11 : E1 - Expression Pedal Speed Limit Function | Default = 10Hz
- 12 : E2 - Speed Pod Speed Limit Function | Default = 10Hz
- 13 : E3 - Vibrato Inentsity Curve | Default = Standard VIB1 Curve
- 14 : S4 - Chorus Intensity Curve | Default = Standard CH1 Curve
- 15 : S5 - System LED Intensity Adjustment | Default = Factory LED Intensity
- 16 : S6 - Factory Mode 16
- 17 : X7 - Factory Mode 17
- 18 : T8 - Factory Mode 18
- 19 : T9 - NOT Currently Used
- 20 : T10 - NOT Currently Used
General Pedal Operation
As I mentioned - the only Trim-pot tweaking I did was for Custom Brightness - more for sake of experimentation than for any particular need. And I did the Pedal+ jack prodding and Speed wiggling to set the External Footswitch to S6 Leslie Ramping Mode - Fast Speed and Ramp Time. That was it really!
The pedal is pretty much perfectly calibrated from the lab / assembly room and I've not felt the need to tweak any other settings. For now I just select the level of Intensity and then Chorus or Vibrato. My slow speed is typically at 9 o'c, occasionally dialled all the way back - while the fast speed is invariably at 3 o'c. I can adjust those elements with ease now if I need to tweak further - while for me the Vibe Machine sounds stellar every which way.
Support Materials
DryBell has a raft of handy Support Materials to help you get the most out of this pedal.
First and foremost the 2 Manuals :
And secondly, a slew / extensive playlist of really useful YouTube Vibe Machine Help Videos :
Demos
Final Thoughts

In some ways I'm a little disappointed with myself that I found my way to the Vibe Machine this late, but I'm equally delighted by the same measure to have acquired the most flavoursome version of the pedal to-date.
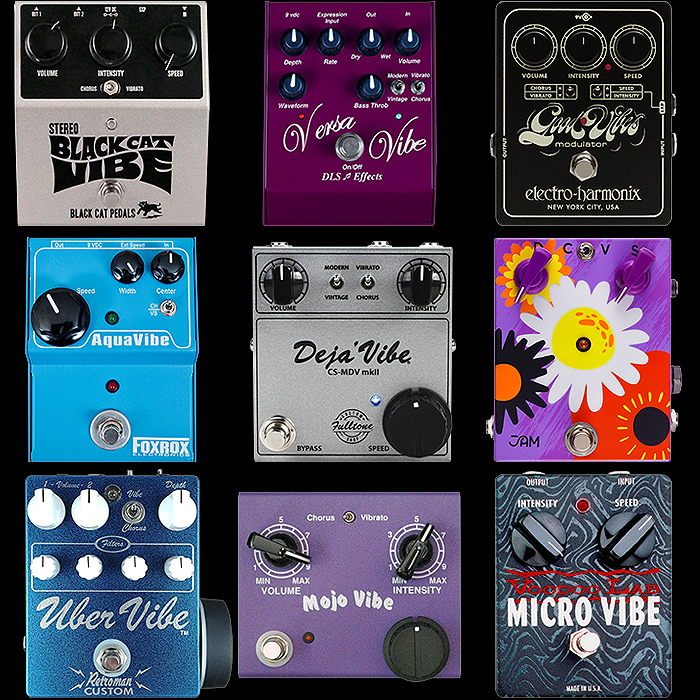
I visibly squirm at the size of so many over-sized Uni-Vibe style pedals - where the Vibe Machine does so much more in a much smaller package. I thought for a time that the pedal should have dual footswitches on the main unit instead of requiring the additional / separate F-1L switch. But considering how slickly everything has worked I'm now wholly satisfied with how things are. Being able to use this pedal in Leslie Ramping style fashion is just perfect, and as mentioned in the intro - this pedal has Tardis-like depths where it's much bigger on the inside than it looks - as it needs to be to cover such a wide range of functionality!
I've viewed and reviewed scores of Uni-Vibe pedals at all sizes and I don't see any need to look beyond the Vibe Machine. The Vibe Machine really is the Ultimate Uni-Vibe as far as I'm concerned - in sound, format and function - you of course need to include the F-1L too!
Using this pedal is an absolute joy - and if you've not got around to getting one of these yet - now's the time - as they've left the best version to last!
Many thanks to Martina for her swift and gracious service, and Kruno for his proof-reading - DryBell are an absolute delight to deal with too - get both the Vibe Machine V3 and the F-1L for $352 - available right now on the DryBell Webstore. Mine got to me in just a couple of days - which is pretty much the record!
I just know you're going to want one too!

